cover page

cover page
Showing posts with label Christmas love. Show all posts

Monday, December 24, 2012

Christmas party at Pear Tree Farm!


So, we had our first Christmas gathering at Pear Tree Farm and it was gorgeous!!
I absolutely loved being able to share special moments with my wonderful in-laws. Cooking together in the kitchen, watching my little PTF kiddies playing with their cousins. Yummy scrummy Christmas food, Michael Buble and Ella Fitzgerald crooning Christmas carols in the background, perfect sunny weather, swims in the pool....what more could a girl want eh?!

Lately I have been a bit of a crazy person I have to admit....poor Mr PTF is still recovering from our 2aminthemorningmarathonofpreparationsforourreallykeepingitsimpleChristmasgathering.......
Oh dear. What shall I give Mr PTF as a peace offering??!

I did enjoy organising and making some of these things for our party. We made bon bons with brown paper, green confetti (hole punched by me one night...never again) a lindt ball and a blessing for each person.


We also strung paper doilies and green glass bauballs from the outdoor market umbrella...looked so gorgeous.


It was so so special to be able to host Christmas at our place (something we have never done in all the 5 years of our marriage!) 
One thing I will say though is that it is NOT a good idea to attempt recipes one has never attempted before on the day you are hosting a Christmas party....not a good idea.

All miraculously turned out fine, but it did make things a little bit hectic! We had a beautiful chocolate pav/meringuey torte thing....half following a recipe half not. I found the recipe online...its a Nigella recipe and it has chocolate in it...how wrong could it go right?!


Chocolate Raspberry Pavlova

For the chocolate meringue base

  • 6 medium egg white(s)
  • 300 gram(s) caster sugar
  • 3 tablespoon(s) cocoa powder (sieved)
  • 1 teaspoon(s) balsamic vinegar (or red wine vinegar)
  • 50 gram(s) dark chocolate (finely chopped)

For the topping (I din't follow this at all....I made up my own version...see below this recipe)

  • 500 ml double cream
  • 500 gram(s) raspberries
  • 3 tablespoon(s) dark chocolate (grated)
Method:
  1. Pre-heat the oven to 180°C/gas mark 4 and line a baking tray with baking parchment.
  2. Beat the egg whites until satiny peaks form, and then beat in the sugar a spoonful at a time until the meringue is stiff and shiny. Sprinkle over the cocoa and vinegar, and the chopped chocolate. Then gently fold everything until the cocoa is thoroughly mixed in. Mound on to a baking sheet in a fat circle approximately 23cm in diameter, smoothing the sides and top. Place in the oven, then immediately turn the temperature down to 150°C/gas mark 2 and cook for about one to one and a quarter hours. When it's ready it should look crisp around the edges and on the sides and be dry on top, but when you prod the centre you should feel the promise of squidginess beneath your fingers. Turn off the oven and open the door slightly, and let the chocolate meringue disc cool completely.
  3. When you're ready to serve, invert on to a big, flat-bottomed plate. Whisk the cream till thick but still soft and pile it on top of the meringue, then scatter over the raspberries. Coarsely grate the chocolate so that you get curls rather than rubble, as you don't want the raspberries' luscious colour and form to be obscured, and sprinkle haphazardly over the top, letting some fall, as it will, on the plate's rim.


For my filling (as I actually split the mixture to make two meringue discs)

1/2 block of philadelphia cream cheese
1 smallish tub marscapone
1/4 to 1/2 cup icing sugar sifted
1 vanilla bean (or vanilla extract is fine too!)
splurge of thickened cream

beat in a bowl till well combined (taste and make sure its not too sweet as you want it to cut through the sweetness of the meringue)

I then spread a layer of the filling in between the two layers of meringue, followed by raspberries and grated dark chocolate. Then I repeated this step on the top of the meringue and put some finely chopped mint on top.

So there you go!

We also had some beautifully bbqd prawns (cooked by my gorgeous hubby) and some salmon also cooked to perfection on the bbq.


Lunch was a very yummy affair that is for sure.
We also had a couple of salads. One with pommegranite....which just looks so beautiful and Christmassy don't you think?!

\

The other one was a fennel, orange, wombok and mint salad. Both so beautiful and fresh. A great way to kick off our Christmas feasting me thinks!


Despite being a little crazy with wanting to try new recipes and hand make gifts for Christmas....I did enjoy preparing for this event and planning and scheming it.

Meanwhile....there has been alot of baking and "gingerman" (as miss O calls them) making, beautiful smells of christmas trees and spices in the air.


Present making has been well underway and most things completed just in the nic of time fortunately!


This is a library book bag I made for my nephew....fortunately you can't look close enough to see all my mistakes...yet again, I attempt something I have never made before....why?! I never learn!

I do love the fact that I can make someone a present though, rather than going out and just buying more STUFF.... I just wish I was a little more organised and could have started this project in October or November....not two weeks before the party....mmm.

I hope you all enjoy your Christmas feasting, festivities, fun and whatever you do this time of year with family and friends.


I am off to spend some time with all my family now and I can relax a bit and not attempt any more foreign recipes....maybe...


See you soon,
xo Rachel


Wednesday, December 12, 2012

Going on a Tree Hunt....


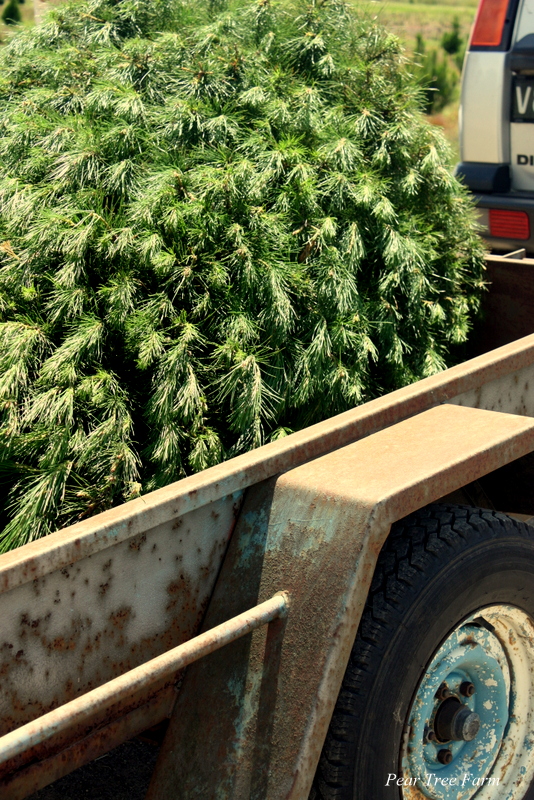
We went on a Bear hunt today....for a Christmas tree.... and we caught a BIG one!!

 It is our first ever Christmas tree in all the 5 years we have been married and I must say its a beauty and was such fun to find.


Admittedly it was a stinking hot 37 degrees out there and we were sweating like pigs and huffing and puffing...alot.


The men who cut it down for us were becoming rather tired of our indecision and miss O's little potty mishap didn't help speed the process up either!


She did encourage them though with a very cheery "Good job men!"


So we ticked Christmas tree off our ever growing list, yay! 


We did however, make a very foolish mistake...never to be made again. When offered a green plastic tree-stand, I firmly said "no way...too expensive...too hideous for PTF...absolutely not!" Surely we could find something much more appropriate and less expensive and offensive....surely. Mmmm, surely not. We searched all over town and came back with....nada. Not to be daunted by this, we bravely determined we would manage our 7 footer with bricks and a bucket (cute rustic bucket of course). Well, it took us forever to get the thing inside, as I am unable to lift anything remotely heavy and am still hobbling around like an old woman.

Poor, sweaty Mr PTF....eyebrows have been raised....more than once. I think he needs a swim to cool off.
Several attempts with bricks and bucket....nada. Soooo.....after spending precious time researching online where to get a more acceptable stand....nada....Mr PTF had to go and drive the drive of shame back to the tree farm and pick up the stand....How does he put up with me I wonder...I shall make him something yummy as a peace offering...perhaps.

After cooling off from our sweaty hunting adventure, we did manage to have lots of fun decorating.
Hideous tree-stand crisis was averted as I covered it with a gorgeous old lace table cloth, what do you think?!


Miss O was thrilled and kept asking mummy and daddy to "make the twee gwow (glow) mummy, daddy....make the twee gwow!" Oooh Christmas is so yummy don't you think?


I am loving keeping the tree simple this year, with just a few precious ornaments that we have collected over the years. I love red for Christmas, but I must say I am loving the look of the white against the green foliage on the tree and muted colours too. Just going for earthy, rustic tones this year and I'm loving it!


We have been busy here at Pear Tree Farm. Family are still coming each week to help me out and look after our little PTF kids. Miss O is full of bucket loads of energy as usual. She is loving running here there and anywhere and swimming in the pool is a definite favourite.

I have been thinking up lots of crafty projects for Christmas, alot of which are perhaps a little bit ambitious...but I can always dream! Miss O is very much into "cwaft" and we seem to be gluing or colouring or cutting something each day, love it.


We made an advent calendar this year which was great fun and Miss O takes great delight in opening a box each day. I am still madly trying to think up activities and surprises for each day....as I was just not quite organised enough!


What do you think of it?! I am thinking next year I may paint the wooden frame, but then again maybe not!

We are also making some Christmas bunting in different green fabrics, to hang up on the verandah. One can never have too much bunting...can one?


I would absolutely love to make some clay tags this year as decorations and about a hundred other things....but I'm thinking I just may not get there!

In the meantime I will just enjoy my lovely Christmas wreath, my gorgeous BIG christmas tree and my beautiful family.


Will hopefully do another post soon, but don't count on it. It is just sooo tricky to get on here these days!

Hope you are all enjoying this lovely, crazy time of the year and are not letting the Christmas frenzy get to you!!


See you soon xo Rachel


Wednesday, December 21, 2011

More Christmas Inspiration


Some more Christmas Gift Ideas

I thought I would show you a bit of green today. I know I do so love all things red at the moment, however I do have a weakness for green too. I just love this gorgeous green bowl.


It is such a lovely colour, so vibrant and I also love that it was made in France...and...the fact that I managed to pick it up at a thrift store for only $4 ...how nice is that?! I think it would look lovely with some white roses in it or some floating tealight candles or the green baubels as pictured or even just plain and simple as is.
I also love the white and green platter....very cracked, chipped and crazed, but that's how I like em!


And my last bit of green are these beads. Little Miss O loves to fling these round her neck and tottle off around the house, parading them around. So I thought I would share them with you....they make me smile.


Hope you are all surviving this last week before Christmas and are not crumbling under the pressure and crowded shopping centres?! I am done with the shops YAY! I now need to get myself into gear...stop blogging and start packing up house and home, not to mention clothes for our time away over Christmas and New Year....Hellllllp!!!


Before I go do that though, as promised in my last post here I am going to show you some more of my Christmas gift ideas. I have been thinking up a storm over here and have come up with a few goodies!

First up is:

Herbed Butter
I wanted to do something with the sage that I picked from my prolific supply in the vegie patch, so I have been trying to come up with some ideas for using it for gifts. I had the thought to make a herbed butter and put it in a cute jar and label it and give it away to someone for Christmas this year. Cute idea and pretty flippin easy!

Here is my recipe

Herbed Butter 


Ingredients:
1 Tub of Spreadable butter
Handful of fresh herbs of your choice I am using sage for this one
Salt and pepper
Smidge of lemon juice


Method:
Allow butter to become soft....room temperature will do.
Chop up herbs finely


Mix herbs into butter in a bowl
Add salt and pepper and lemon juice


Spoon butter into sterilised jar, seal and refrigerate.
Attach a cute label with some ideas for how to use it (ie, on a steak, on a french stick with pasta on toast...etc)


There you have it...too easy in my book!

My other brainwave with trying to use up herbs is to make herb infused olive oil. Now I have never done this up until writing this post, so I am no expert by any stretch. I looked some info up online about flavouring oils and you do need to be careful to do it properly. You need to make sure you use sterilised jars and also be careful in preparing the herbs.
Here is the recipe


Lemon and Sage Olive Oil


Ingredients:
Zest of 1 lemon (must be completely dried out.)
Good quality olive oil (however much you need for your jar/bottle size)
Dried handful of sage (or another herb of your choice, but it must completely dried unless you plan to use it within the week and keep it refrigerated)
1 Sterilised jar or bottle (whatever size you want)


Method:
Peel the lemon with a peeler and place on a tray to dry completely. I read online that this may take a few days. You could alternatively dry it in a dehydrator (but as if I have one of those) or you could put the tray in the oven on very very low. The main thing is that both the herbs and the zest need to be completely dry, or else bacteria can start to grow in the oil.

Give the lemon zest a bit of a bruise with a mortar and pestle (just to bring out the oils)


Add the dried herbs and lemon zest to the jar or bottle.


Pour in enough olive oil to fill your bottle.


Label and seal. Done.

Store in a cool, dark place. Keep an eye on it and if the herbs look a bit funny or you start to notice any bubbles you probably need to discard it. It means that you may not have dried out the herbs or lemon zest properly and bacteria has started to form. If you are worried about it, you can always just keep it in the refrigerator and use within a week. Go here for more information about safely infusing oils.


Too easy yes?!

Next up is nice and simple too! My sister started making this a couple of years ago and it has been a great hit ever since. Can't remember where she got the recipe? It may have been in a Coles recipe booklet, but I just think of her when we have this so I am going to call it her Peppermint Chocolate Slab. It is super easy and really tastes yum...surprisingly.

Peppermint  Chocolate Slab


Ingredients:
400 grams of chocolate (I actually used coles chocolate blocks and had a mixture of dark chocolate and milk chocolate, which was quite nice.


Not too bitter or not too sweet). You can even use chocolate melts if that is all you have.


12 Peppermint flavoured candy canes


Method:
Prepare a baking tray with some baking paper/grease proof paper
Melt the chocolate in a bowl....I use the microwave to do this, but you can do it over a double boiler or whatever over the stove if you prefer.


Crush up (pound the living daylights out of) the candy canes


Spread the melted chocolate out on the lined tray as smoothly as you can, then add the crushed up candy canes on top.


Refrigerate till set. Should take about 1 hour or so.
Break up the hardened chocolate slab or cut up into shard-like bits.


Place in a nice jar or wrap in celophane and label with a cute gift tag and you're done! How cute is that?


Mr PTF has just seen this post and these peppermint slabs have gotten the better of him.....he is raiding the fridge as I write this and eating some with a cup of tea....better go and stop him....

See you soon,
Hope these ideas have given you some inspiration!
xo Rachel


I linked up with...


Related Posts Plugin for WordPress, Blogger...